Pages

Sunday, 23 December 2012

Pigtail Polly

Helloo, I have a project today made for the fab Scrapbook Stamp Society using a gorgeous digital image by the very talented Sherri Baldy.  Here's what I made ...


It's my usual 8x8" scalloped edge card blank, covered with lush chocolate brown paper from my stash.  The pink patterned paper is also from my stash and is cut using a shaped template, then inked around the edges with distress ink and I added a hand doodled border for extra interest.  

The cute little image is 'Pigtail Polly' by Sherri Baldy and can be found in their online store HERE.  I coloured her with my Promarkers and added a little glitter to her frilly skirt and the little rose. 

Added embellishments include a border cut with a Martha Stewart punch, three dusky pink paper flowers with brown candi centres, some brown die-cut swirls, a couple of pink hearts, a few adhesive gems/pearls and a lovely little sentiment from LOTV which reads 'Because You're Special' to finish off.

If you have time, pop over to the blog and check out some of the work by my fab teamies HERE.

Hope everyone is ready for Christmas!
Hugz, Jan xx

Friday, 21 December 2012

Happy New Year

Hellooo crafters,

I is a little excited today, after finishing school for our Christmas break yesterday and today I have done my festive food shop and finished wrapping my christmas prezzies!

Very organized, so I thought - until I remembered it was in fact Friday and the new challenge over at Polkadoodles!!  So here I am, a little later than usual with my DT inspiration for this week's challenge which is all about the 'New Year' or using the numbers 2013 on your project.  Here's what I made ...


It's a very quick and simple card, as time is precious at the moment (not sure why!!) Lol.  I used paper from the Polkadoodles 'Pen & Paper Circle 3' to cover the bottom of the card and added a die-cut border from silver mirri board to separate it from the white.  I drew a little hand squiggled doodle border above the die-cut with my fine liner pen and added a 'Happy New Year greeting on my pc.  The star template can be found on the 'Sundae of Seasons' CD and is covered with the same paper, and yes, I did use some black outline stickers for the '2013' date!  The whole card took about 15 minutes to make. Simples!

I hope everyone has a great stress free weekend in the build up to Christmas.
Sending very best wishes,
Jan xx

Saturday, 15 December 2012

Gift Certificates

Happy Saturday,

Has everyone completed their Christmas shopping yet?  

Well, if you are stuck what to buy for one of your crafty friends, then pop over to the Scrapbook Stamp Society - they have some fabulous gift certificates available to use in their on-line store.  There is a fantastic range of digital images, together with lots of other crafty goodies to spend the vouchers on, so why not buy one for a friend, or pop one in your own Christmas stocking.  

Just click the HERE and take a peek, go on - you know you want to ...


While you are there, why not pop over to the digi store where there are loads of fantastic digital images available for only $1.00 - that's only 62p each!! Madness - just click HERE for more information.

Hugz, Jan xx

Friday, 14 December 2012

Winter White

Hi there everyone,

My it's been a cold week here - the temperatures haven't been above freezing all week.  My poor little car has been doing a fab impression of an ice cube every morning!  Hope everyone is staying safe in all the ice and frost.

It's time for a new challenge over at the Alphabet Challenge blog today and we are up to the letter 'W', so we would like to see your 'Winter White' projects this week simply using just white!  This one suits my love of monochrome, but don't think I have ever used just white before - definitely a challenge.  Here's my DT inspiration ...


I used a 6x6" plain card blank which is topped with another square of plain white card.  I added three strips of card which have been run through my little dotty embossing folder for some texture. I touched the edges of the card with my silver Promarker just to define them a little. The horizontal strip is cut with my 'Fleur de Lys' Spellbinder edging die and I have wrapped a piece of 'Merry Christmas' ribbon around the centre.  The card is finished with a die cut snowflake and a white flat backed pearl, together with a little rub-on sentiment. I think it looks very crisp and definitely matches all this frosty weather we have been having recently.

Don't forget to pop over to the blog to check out my teamies fab work too.

Hugz, Jan xx

Sunday, 9 December 2012

The Scrapbook Stamp Society

Happy Sunday everyone,

I am excited to be posting today in my role as new Design Team member over at the Scrapbook Stamp Society after being invited to join them last week.  They have a huge selection of digital images and my favourites are by the very talented Sherri Baldy.  Here's what I made for my first project ...


It's one of my favourite 8x8" card blanks covered with gorgeous paper from K & Company which is mounted onto kraft card.  The image is called 'Lucy Lou' and can be found in the on-line store here - http://scrapbookstampsociety.com/auction_details.php?name=Lucy-Lou-Bestie-big-heads-digi-stand-by-Sherri-Baldy&auction_id=104672
I coloured her with my Promarkers and also mounted her on kraft card.  I added green polkadot ribbon and a trio of flowers with button centres and co-ordinating die-cut swirls to match the paper.  A few adhesive pearls and a 'Happy Birthday' sentiment finish the card.

Hope you enjoy your weekend,
Hugz, Jan xx

Friday, 7 December 2012

Paper Piecing

Hellooo there,

It's been a very busy week here and I must admit I haven't had much time for blogging this week - so I'm sorry if I haven't managed to get around to all your gorgeous blogs this week.  I also wanted to say hello and welcome to my lovely followers, who are climbing steadily :)

Well, if it's Friday again it must be time for another challenge over at the Polkadoodles challenge blog.  This week our Claire would like to see your 'Paper Piecing' projects, including the use of newspaper somewhere on the project.

I decided to take this literally and actually use pieces of paper from my stash that were left over from previous projects.  Here's what I made ...


I made my own tag from a piece of left over kraft card and topped it with some gorgeous brown text paper (from the 'Pen & Paper Circle 3' CD) that I found in my stash.  The edges are inked with my fav Walnut Stain distress ink.  The flowers are from the 'Candy Doodles' CD and the large one is cut from some more scraps of paper with the two smaller flowers cut from newspaper.  I added little co-ordinating buttons for the centres.  The cute little owl is printed from the 'Sugar Birdies' CD and I paper pieced his tummy with some more newspaper and gave his some funky googly eyes for a fun element.  A piece of ribbon, a couple of distress stain ink splats, some flat backed pearl accents and a 'Just for You' sentiment (which is also printed from the Candy Doodles CD) finish off the project.  

Don't forget to pop over to the blog for some more great inspiration from my fab teamies.

Hugz Jan xx


Friday, 30 November 2012

A little bit of Vintage

Hello crafters,

It's challenge day over at 'The Alphabet Challenge blog' and we are on the letter 'V', so would love to see your Vintage projects this week.  I love this style of crafting and I think it can be worked into so many different projects.  Here's my DT inspiration for this week's challenge ...


It's one of my favourite 8x8" card blanks, covered in gorgeous paper from the Tim Holtz Vintage Shabby paper stack, which has been edged with Victorian Velvet distress ink.  The shaped piece was cut using a Spellbinders Labels 17 die and then run through a script embossing folder for some texture.  I ran the Victorian Velvet ink over the script just to define it a little.  The stamped image is 'Kaisercraft - Botanical' and is also stamped in the same distress ink for a monochrome look.  The main image is mounted onto a piece of gold mirri card to high light it.  Embellishments include a TH paper rosette cut from the same paper, a piece of lush ivory lace and three ivory flat backed pearls.  I also scattered some gold frantage embossing powder across the card for a little extra interest.

I shall look forward to your entries over at the challenge blog.
Hugz, Jan xx

Sunday, 25 November 2012

Guest Designer at Joanna Sheen

Well hello and happy Sunday to you all,

I'm a little excited this morning - it's my Guest Designer spot over at the Joanna Sheen challenge blog.  This week brings an 'Anything Goes' theme and I was lucky enough to receive some gorgeous House Mouse decoupage to work with.  Here's what I made ...


I made the card blank from cream textured cardstock and covered it with paper from my stash which has been inked around the edges with Walnut Stain distress ink.  The cute little house mouse is decoupaged and nestled warmly in his basket and layered onto a Lacey Circle cut from the same cream textured cardstock.  The 'Wishing you a Speedy Recovery' sentiment is also Joanna Sheen and the card is embellished with a paper flower with button centre, a couple of swirls die-cuts and three little adhesive pearls.

The card opens up to reveal ...


...  a little cold remedy survival kit for those days when you might be feeling under the weather.

This was a fun project to make and I am very grateful to the team over at Joanna Sheen for choosing me to be their Guest Designer for this challenge.

Enjoy the rest of the weekend,
Hugz, Jan xx

Saturday, 24 November 2012

Santa's Reindeer


Good morning,

It's my turn to post over at the Studio 12 blog today and I have a little inky project to show you.  I have used elements from the Picknix 2 - Gingerbread Twist collection and added them to a page in my Art Journal.  Each year we can never seem to remember all seven of Santa's reindeer names, so I thought I would journal them to keep them safe.


The background is coloured with Dylusions Squeezed Orange spray ink and TH Frayed Burlap distress ink before I layered the cute little reindeer on top.  The letters are printed onto the gorgeous brown crumpled paper (both from the CD) then I tore them and inked them before adding them to my page.  A bit of journaling and my reindeer names are safely recorded for the future.

Hope you all have a great weekend,
Hugz, Jan xx

Friday, 23 November 2012

Any Die will Do


Hi there folks,

I can't believe it's Friday again so soon! This week has been manic! But, Friday means it's Polkadoodles challenge day and this week we would like to see your creations using a Marianne Die - as the title says 'Any Die will Do!' 

I decided to be a little different this week and wrap a present and make a gift tag, using papers from the 'Paper Boutique Vol II CD' and a little sentiment from the 'Here Comes Christmas CD'.  Here's the finished project ...


The first layer of the tag is a scalloped circle cut from red textured card.  I then used the little swirl die from the Marianne LRO108 Flowers set and cut it eight times from dark green card.  These are positioned around the red layer and stuck down in the middle.  The next layer is a scalloped circle cut from gold mirri card, topped with a TH paper rosette cut from the same paper that the gift is wrapped in.  Finally I added a little sentiment, layered onto another circle of red card. Voila! 

Don't forget to check out the blog for some more fab inspiration from my very talented teamies.

Hugz, Jan xx

Friday, 16 November 2012

Birdies at Sunday Stamper

Hellooo again!

Well, I'm like the buses today - you don't see me for a while, then three (yes, three) posts in one day!! That's definitely a record :)  All I can say is 'what a week!'  To those of you who know the school system, if I mention OFSTED then you can imagine my week!!  I have lived and breathed school for the last few days. Lol. Anyway all is done now, just waiting for the verdict!

So, I have an inky offering tonight which I made for the Sunday Stamper challenge - the theme this week is 'Birds'.  Here's what I made ...


The background was made using Dyan Reaveley's Dylusion ink sprays in Vibrant Turquoise and Fresh Lime.   I added some spots of water and a little ink through the diamond stencil before stamping a text stamp and my 'Birdie on a branch' from Chocolate Baroque using an archival black ink.  I splodged a bit of gesso through some sequin waste to create some lighter areas, then added the 'Sing your Song' wording. This was stamped onto a scrap of card which had been sprayed with the Vibrant Turquoise and a little Cosmic Shimmer pearl to make it sparkle (this doesn't show very well in the photo).  I also stamped the birdie again and cut him out to perch on top of the wording.  I printed the words 'Come fly with me' on my pc, cut and inked them before added them to the design, then doodled a border for a finishing touch.  Hope you like :)

Hugz, Jan xx


Exciting News ...

Well hellooo,

Here's the second post from me today (well, that's a first!) Lol.  I have some news ...

I was sat playing my game of 'Words with Friends', like you do on an evening, when my chat box popped up.  I was both surprised and thrilled to be asked by my good friend, Cazro, if I would like to join her on the Design Team over at 'The Alphabet Challenge Blog'.  Needless to say, I said YES please!!

So, this is a new venture for me and I hope you will come and play with me over at 'The Alphabet Challenge'.  This week the letter is 'U' and the theme is 'Under the Weather' - so we would like to see your projects that might cheer that someone up who is feeling a little under the weather.  Here's what I made for my very first DT project ...


I decided to make a cover for my tissue box which simply slides over the box, so when the tissues run out you can slide it off and add another box.  I used kraft card and papers from my stash and the edges of the paper are inked with Walnut Stain distress ink.  I decorated the top edge with a Doohickey Tilda Lace die, cut from the kraft card.  

Here's a closer look ...

Front View

The main image is 'Fizzy Moon - With Love'.  Fizzy is coloured with my Promarkers and the flowers are paper-pieced and decoupaged with scraps of the backing paper.  I added extra die-cut flowers with pearl centres and little punched flowers with pink adhesive gem centres.

Top View

The top includes a little sentiment which reads - 'Hope you're feeling better real soon', which was printed on my pc, cut out and inked.

Side View

The side is decorated with scraps of paper from my stash, including a little heart cut from the craft card and a punched flower.  The little daisy stamps across the bottom are from the Fizzy Moon stamp sheet.

Hope you like my first DT project for the Alphabet Challenge - why not pop over to the blog to see some more inspiration from my teamies.  I shall look forward to visiting your blogs and checking out your entries.

Hugz, Jan xx

Polkadoodles Challenge Day

Good morning everyone,

I've got that Friday feeling, which means it must be challenge time over at the Polkadoodles blog.  This week we would like to see your 'Square cards' that include a 'Round element' on them.  Simples!  Here's my DT card for a little inspiration ...


Back to the Christmas cards this week - I used the 'Here Comes Christmas CD' to print papers, the snowman and sentiments before assembling the card.  The snowman image is decoupaged to give some depth to the card and the 'round element' includes a little snowman joke. Well, what do snowmen eat for breakfast, I hear you say ...


Snowflakes
of course!! Lol.  

Just twist the top circle, which is held in place with a brad, to reveal the answer hidden underneath.

I shall look forward to visiting your blogs to take a peek at your entries - don't forget to pop over to the challenge blog to see some more fab inspiration from my teamies.

Hugz, Jan xx

Sunday, 11 November 2012

I'm so excited ...

Good morning to you all on Remembrance Sunday,

Sending out special wishes to all those remembering someone today - it's the anniversary of my dad's death this weekend and although he wasn't in the forces, it's still a time to remember for our family.

I don't actually have anything to show you today - but I do have some very exciting news.  I was fed up at the beginning of the week, returning to work after the half term break (most of which I spent crafting!).  But the week definitely got better as it went on.

My first bit of excitement was mid-week when I was invited to join the Design Team over at 'The Alphabet Challenge Blog' by my good friend, Cazro.  Of course I said 'Yes' and my first DT project for them will be included in next week's challenge - if you would like to go check out the blog click here.

My second bit of excitement happened this morning when I was checking the blogs I follow.  To my utter surprise, I have been chosen as a Guest Designer over at the 'Joanna Sheen Challenge Blog'.  So, watch this space in the not so distant future for my DT project :)

I'm also willing this week away too, as I'm attending a craft workshop next Saturday where I will meet the fantastic Hels Sheridan.  I'm a big fan of her work and can't wait to get all inky with her - if you would like to check out her blog, click here.

Right, I'm off to lie down in a dark room now - don't know if I can cope with all the excitement (it doesn't take much to please me, does it!) Lol.

Oh, just realised that I have no piccies - so thought I would share one of my gorgeous furbabies sharing a moment :)


See you all soon,
Hugz, Jan xx

Saturday, 10 November 2012

Xmas Decorations at Studio 12


Good morning,

I hope the weekend finds everyone well.  It's my turn to post over on the Studio 12 blog today and I thought I would show you a simple little Christmas ornament that I made using the Picknix 2 - Gingerbread Twist CD ...


It's made using two papers and a sentiment from the CD, plus two die-cut scalloped circles and lots of bling!   I cut a scalloped circle from dark red pearlised card, then added a slightly smaller scalloped circle cut from one of the red papers, which was inked around the edge with Walnut Stain distress ink.  The next layer is a concertina paper rosette made using the second red paper and the topper is a sentiment from the CD mounted on another dark red scalloped circle.  Bling it up to your hearts content and add a piece of hanging ribbon and 'Voila' - a simple decoration.

You could easily adapt these to include an image in the centre, or even personalise them with family greetings.

See you all soon,
Hugz, Jan xx

Sunday, 4 November 2012

Clarity Christmas

Happy Sunday everyone,

Just a quick post from me today - I am getting ready to go back to school tomorrow (groan!)

I have spent quite a bit of time watching the very talented Barbara Gray on C & C this weekend and decided to have a go yesterday with my new 'Letterbox' stamp set which I bought at a recent craft show.  So, armed with my brayer, splodge mat and stamp set away I went - here's the outcome:


I followed Barbara's lesson from the telly yesterday, although I don't have the same stamps as she did - so I improvised with a set from my stash.  The splodge mat has opened a whole new door as far as brayering is concerned and the new 'Letterbox' stamps are a dream to use.  I find it totally fascinating to create cards simply using ink and stamps - my normal style is to add a bit of everything! Lol.  I am really pleased with the result and the design looks so clean and simple.

Enjoy the rest of the weekend,
Hugz, Jan xx

Saturday, 3 November 2012

A Tag in a Pocket

Morning everyone,

I'm a little late posting this morning, have been engrossed in my art journal since 7am this morning! Yes, you heard right - I couldn't sleep!! Lol.

I have a different project to show today - as the title says, it's a tag in a pocket! Couldn't think what else to call it - see what you think ...


I made the pocket from some champagne card stock and then covered it with lush paper from the 'Prima Almanac' paper pad and a postcard from my stash.  I have recently bought the TH die to make paper rosettes and I can't stop playing with them.  The extra flowers are also Prima to match the Almanac range.  Embellishments include black die-cut swirls, buttons and adhesive pearls.

Here's the tag that nestles inside ...


I absolutely love this photo (can't remember where it's from, but there are several on one sheet).  

I would like to enter this in the 'Fussy and Fancy Friday Challenge - Pearls and Flowers'

Hope you all have a great weekend,
Hugz, Jan xx


Friday, 2 November 2012

Bright and Sparkle


Hi there everyone,

It's Friday again, which means two things - my half term break is almost over and it's Polkadoodles challenge day!

As Bonfire night approaches quick and fast we would like to see your 'Bright and Sparkle' projects this week over at the challenge blog.  Remember, it doesn't have to be a card - it can be any project at all as long as we can see some 'bright' and 'sparkle'.

Here's what I made for some DT inspiration ...


I thought I would have a change from Christmas this week and made a bright cheery card for a 'Special Day'.  The square paper pieces are all printed from the 'Sugar Plum Daisy CD' and are inked around the edges with matching distress ink.  I made the centre panel on my pc, using letters from the 'Picknix 2 - Gingerbread Twist CD' to spell the word 'Sparkle' (I exported them to Paint and played around with the colour to make them all bright).  The sentiment is also made on my pc and I added a sparkly star (printed from the 'Sundae of Seasons CD') then treated it to a generous helping of glitter for some lovely sparkle.

Go on, pop on over to the blog - you know you want to! Lol.
Hugz, Jan xx

Thursday, 1 November 2012

Silhouette

Good morning,

Yay, I have finally managed to master my brayer! How did I do this I hear you ask?

Well, after watching a demonstration with the brilliant Barbara Gray at a recent craft show, I decided to spend some of my hard earned cash on a 'Splodge Mat'.  I then tucked it away carefully in my craft room, a little afraid to use it in case I failed again!  But boldy pushing my fear aside yesterday, I prepared all my equipment, chose my inks and had a play - finally achieving some success!

I wanted to enter the Joanna Sheen challenge this week, which is 'Silhouettes' so had a play around with a brayered background for my card.  This is what I came up with ...


I used Spun Sugar and Tumbled Glass distress inks with the brayer to make the background for both the picture and the card blank.  I over stamped the card blank with a swirly stamp and highlighted this with some pearlised chalks for a little extra interest.  The silhouette scenery stamps are mainly Clarity stamps and I added a little sprinkle of crystal glitter from the fairy (not easy to see on the photo).  A piece of black ribbon and bow, some black adhesive pearls and a stamped sentiment finish the card. 

It was very different for me not using any paper products on my card, but I must say I'm very pleased with my attempt and the 'Splodge Mat' definitely made it easier to manage the brayer - I can see my little brayer might not spend quite so much time in the cupboard now. Lol!

Enjoy your Thursday, 
Hugz, Jan xx

Wednesday, 31 October 2012

Christmas for the Girls

Hi there everyone and Happy Halloween,

Wow! This is my fifth day in a row posting - never been done before! Lol. I am definitely liking being at home and trying not to think about next week back at work.

I have a little card to show you today, made for 'Lili's Little Fairies blog challenge' - the theme this week is to make a Christmas card for the Girls.  Well, what better reason to get all my purple stuff out then :)  Here's what I made ...


This one's a 6x6" card blank covered with some pretty lilac snowflake paper from the 'Snowman paper pack', which is mounted onto some lilac card..  I added a piece of lilac organza ribbon across the middle before adding my topper.  The stamped image is LOTV - Twinkling Star and is coloured with Lilac and Amethyst Promarkers.  I added some sparkle to the little stars and snow with a glitter gel pen. The image is mounted on a Fleur de Lys nestie cut from the same lilac card as the background mat.  I die-cut some snowflakes from a piece of scrap and added self adhesive gems/pearl to the centres and finished with a little Christmas sentiment.  A fairly simple little card, but the LOTV stamps never fail to impress every time I use them.

I would also like to enter this card into 'That Craft Place's' challenge which is 'Tic Tac Toe' and I chose the left hand side column - Gems/Sentiment/Ribbon.

Thanx for taking the time to have a peek and enjoy your day, whatever you're doing.
Hugz, Jan xx

Tuesday, 30 October 2012

A bit of Romance

Happy Tuesday,

Well, I have made a discovery - how easy it would be to stay at home and craft all day! Lol x I wish ...  I had to give myself a good talking to yesterday, I need to work to fund my hobby - it's that simple!

Anyway, here's what I came up with yesterday morning after visiting a good friend's blog and seeing her gorgeous DT card for the 'Make My Monday' challenge, using a stamp that I have myself.  I must admit I haven't used it yet, so what better way to get it all inked up.  Here's what I made to enter the challenge ...


It's back to my favourite 8x8" card blanks today (which I now have in cream as well as white)! Lol.  The pink backing paper is from my stash and I gave it a liberal spritzing with my Cosmic Shimmer Pearl Mist first and then inked the edges with Pumice Stone distress ink for a subtle finish.  

The layout on the card was chosen to enter the 'Sketch N Stash' challenge and as I said earlier - I used a Kanban stamp that has been sat in my box, neglected for a little while :(  I coloured the hat and bodice with my Promarkers and then paper pieced and decoupaged the skirt to try and emphasise all the ruffles.  The gorgeous Eiffel Tower paper is from the 'Wild Rose Studio - Letters from Paris' paper pack, which fits the theme perfectly and is also edged with Pumice Stone distress ink to soften the edges.

I added some pretty ivory lace, a cluster of matching flowers, 3 gorgeous pearls, a metal corner and a little sentiment (made on my pc) which simply says 'Je t'adore'.

I would like to enter my card into the following challenges:

Make my Monday - France/Feminine Romance
Sketch N Stash - challenge 99
Simon Says Stamp and Show - Just add Pearl  
(pearl Cosmic Shimmer mist and 3 adhesive pearls)

Thanx for taking the time to look and a huge thanx to those of you who regularly leave me comments :)
Hugz, Jan xx

Monday, 29 October 2012

Halloween

Happy Monday morning to you,

I hope everyone had a great weekend, despite the snow in some places.  We had a little flurry on Friday evening, but not much more over the weekend, thank goodness.  It's half term break here this week, so I have more time to craft and visit blogland :)

I have been busy over the weekend with some design team work, but also made a little creation for Halloween too.  Here's what I came up with ...


This is the front of my little Accordion tag book, which is covered with some spooky black paper.  The image is LOTV - Abracadabra and is coloured with my Promarkers.  And now for the inside ...


The inside is covered with some more stashbox papers and a selection of die-cut and digital images, together with some super black ribbon which has purple witchy hats on, a little metal pumpkin charm and some Halloween wording.

I would like to enter this project into the following challenges:

Craft Punked - Halloween
Creative Inspirations - Happy Halloween
Fashionable Stamping - Halloween or Halloween colours
Stamping for the Weekend - Anything Goes
Try it on Tuesday - Halloween

See you soon,
Hugz, Jan xx

Sunday, 28 October 2012

It's Candy Time ...

Morning everyone,

I hope you are all tucked up nice and warm and not having to battle any snow! I can't believe it snowed in October!

Well, as another month passes us by it's candy time again over at the Studio 12 blog - the design team have been very busy with some fab inspiration for you and there is some fantastic candy just waiting to be won.

In preparation for christmas I've made a Carol Sheet, ready for when I go carol singing!!! It would really be snowing then, I hear you say!! Lol.


I used the gorgeous frame from the 'Candy Wraps' jar in the Picnix Pantry on the 'Gingerbread Twist CD'.  I added the 'Jingle Bells' title and then typed out the lyrics for this popular christmas song.  The little bell embellishment is also from the CD. All together now ...,

Hope you enjoy the rest of the weekend,
Hugz, Jan xx

Saturday, 27 October 2012

Beautiful Moments at Studio 12


Happy Saturday everyone,

It's my turn to post over at Studio 12 again today and I have another quick and simple Christmas card to show you.  I love this particular sentiment from the 'Picknix 2 - Gingerbread Twist CD' and thought it deserved to be the focal point on the card, instead of my usual coloured image.  What do you think?


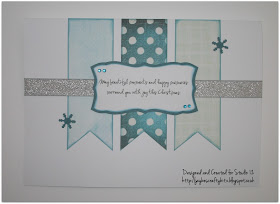
I used a plain white A5 card blank and added three different strips of blue paper from the 'Picknix 2 - Gingerbread Twist CD'.  The silver ribbon is from my stashbox and I embellished with a couple of punched snowflakes and some self adhesive gems.

Don't forget to check out the blog tomorrow for the October giveaway - oops, did I say that out loud!! Lol x

Have a great weekend (and don't forget to change the clocks tonight!)
Hugz, Jan xx

Saturday, 20 October 2012

Contemporary Christmas


Hi there everyone,

It's my turn to post on the Studio 12 blog and I have christmas project for you today.

I have been reading a lot about the cutting files that Nikky included on the Studio 12 Picknix CDs and Lou's snowflake card yesterday was lush, but sadly I do not have a cutting machine (hope Santa's listening!) Lol.

Anyhow, I have avoided choosing them from the pantry menu on the CD up until now, but thought I would take a little look at the files and what did I find!  Some gorgeous black silouhette .png images that can still be exported into your chosen publishing software to play with.  Maybe I'm a bit dim, but I didn't know you could use them like this - thought they were just for cutting, doh!

So after playing around with them in Microsoft Word, here's what I came up with ...


I made a Christmas card and matching gift tag, using just two of the many gorgeous images from the cutting file choices.  

I cut my background paper to the chosen sizes for the project, then went to work with my distress inks for a change, instead of using a backing paper.  I layered up four colours using a blending tool, starting with Mustard Seed, then added Dried Marigold, then Spiced Marmalade and finished with Rusty Hinge (I just love the names on these inks!)  I then stamped around the edges with a little snowflake stamp in some of the same colours to build up the background.  

Once I had manipulated my chosen images to the right size for the project, I printed them onto the inked backgrounds.  The easiest way I have found to do this is to print the images onto a piece of plain copier paper, then position your background pieces into the right place using a little repositional glue (I use my tape runner) then pass the paper back through your printer.  This allows perfect alignment of the images, ready to use in your project.  

Mine are backed onto black glossy card to accent the black images and I drew a funky pot under the tree to fill the gap. Some black adhesive gems and a bit of sparkle and hey presto - a bit of contemporary christmas!

Enjoy the weekend,
Hugz, Jan xx

Friday, 19 October 2012

Autumn


Hi there crafters,

It's Friday challenge time over at the Polkadoodles challenge blog and this week's theme is 'AUTUMN'.

I love the colour palette that this week's challenge offers and decided to make a word book for my DT project using the letters and template from the 'Candy Doodles' CD.


Here's four easy steps to make your own word book:

Step One:  
Print out your chosen papers (details of where to find mine below):

Brown polkadot - Picknix 2 'Gingerbread Twist'
Red polkadot - Pen & Paper Circle 3
Orange crosses - Sugar Birdies
Brown circles - Paper Boutique Vol 1

Step Two:  
Cover your letters and template with chosen papers 
and cut around the letters.

Step Three:  
Align the letters and trim all pieces to the same length, 
punch and secure with your chosen fastening.

Step Four:  
Embellish to your hearts content!  
All my embellishments are printed from the 'Sundae of Seasons' CD.  
A couple of ribbon ties, some bling and the little 'FUN' pennants 
are from my stash.

Hope you like my project this week - don't forget to pop over to the challenge blog for some more great inspiration from my fab teamies.  I shall look forward to seeing your entries.

Hugz, Jan xx

Sunday, 7 October 2012

Zentangle

Hi there,

I hope everyone is having a good weekend.

I haven't been well all weekend and have subsequently done very little!  I will be playing catch up all week now.  Whilst sat watching the X Factor last night I decided to have a little doodle in the style of 'Zentangle'.  I have played around with this before with very little success, but after a bit of research I designed my very first display piece.  I am pretty pleased with the outcome, so thought I would show you what I came up with ...


It all started out with a group of different sized circles - some overlapping and some separate.  Then I doodled for two hours with my micron pen and added a bit of pencil shading. 

Back to school tomorrow - hope I feel a bit better.
Hugz, Jan xx

Saturday, 6 October 2012

Gingerbread Gift Box


Hi everyone

It's my turn to post over at the Studio 12 blog today and I thought I would show you another of my TV samples for the amazing Picknix 2 collection 'Gingerbread Twist'.  This little box template is so versatile and can be used for almost any occasion - this time I made a little christmas gift, using the gingerbread theme and filled it with gingerbread biscuits.


The paper and all the different elements are from the 'Gingerbread Twist' CD, with the addition of some die-cut shapes and my favourite 'Walnut Stain' ink to define the outer edges of the box.  The box template can be found on the Polkadoodles 'Paper Boutique - Vol 1' CD.

I am definitely planning a few more of these for little christmas treats this year.  
Hugz, Jan xx

Friday, 5 October 2012

Wings and Things

Hi everyone,

It's Friday again, which means it's challenge day over at Polkadoodles and it was my turn to choose the theme this week.  I had to pick something which allowed me to use one of my favourites - butterflies, but I am looking forward to seeing all the different interpretations of 'Wings and Things'.  Here's what I made for the challenge ...


I chose a pretty pink paper, some gorgeous black silhouette butterflies and a lovely sentiment from the Candy Doodles CD to make a wall hanging for my craft room.  I started with the paper and arranged all the black butterflies and sentiment before printing it out.  I then masked some of the butterflies before adding lots of extra interest to the paper with some 'Spun Sugar' distress ink.  I cut out another butterfly and treat it to a sprinkling of pink glitter before adding it to the oval nestie focal point. The project is mounted on black mirri card, then again on pink card before I added a piece of black ribbon for hanging and the usual sprinkling of adhesive gems for a bit of extra bling!

Don't forget to pop over to the blog for some great ideas from my fab teamies.

Hugz, Jan xx

Saturday, 29 September 2012

A Special Birthday

Happy Saturday everyone,

I can't believe how fast the time is flying by - I have already been back at school four weeks, only another four until the next break! Lol.

I hate to say it, but I haven't done much crafting this week - I have been so incredibly tired.  My hubby thinks I may have had some sort of virus - I said 'Yes, it's called sleeping sickness!'

Anyway, I have a very special card to show you today - one which I made for a special crafty friend who celebrated her birthday a few weeks ago.  I don't think she will mind me showing it you today ...


I bet you couldn't guess her favourite colour is PINK!  I raided my stash for everything pink I could lay my hands on, as you can see.  Here's the ingredients I used:

Image - Magnolia 'Princess Tilda'
Colour - Promarkers
Papers - Magnolia, My Mind's Eye (text paper was from my stash)
Sentiment - LOTV 'Recipe Sentiments'
Die-cuts - Doohickey: 'Vintage Daisies', 'Heart Swirl', 'Lovely Fence', 
'Antique Lace', Dragonfly and Marianne leaf die: LR0226
Embellishments - pink polkadot ribbon and bow, text heart, flat backed ivory pearls, 
pink adhesive gems, pink eyelets, 'wish' lettering
Ink - TH Distress ink 'Walnut Stain' and 'Victorian Velvet'


The sentiment is stamped onto a Doohickey 'Vintage Tag' 
and is tucked in behind the main image for an extra little surprise.

I think this particular Magnolia stamp is quickly becoming a favourite amongst my ever growing stamp collection - it fits so many different occasions.  Hope you like my little creation - I'm sure my friend did :)

Enjoy the rest of your weekend,
Hugz, Jan xx


Saturday, 22 September 2012

A Gingerbread Christmas


Morning everyone,

It's my turn to post over on the Studio 12 blog today and I can't believe just how many gorgeous ideas have been shown over the last couple of weeks - I consider myself very fortunate to work with such a talented bunch of people.

I thought I would show you one of my TV samples that I made for the launch of the new Picknix 2 collection.  I just adore all those little gingerbread people and couldn't resist popping one straight onto a card the minute I received them.  So, here we go ...


I love this shade of green, I think it's much softer than the traditional christmassy green and I used three different papers that all co-ordinate nicely for the background layering on the card.  The little gingerbread girl is sooo cute with her little mop cap and christmas stocking - I printed her straight from the CD and layered her onto some matching cardstock.  The sentiment is also from the CD.  A piece of organza ribbon, a couple of sprigs of holly (also from the CD) and some red adhesive gems finish off the card.  Hope you like it!

Have a great weekend,
Hugz, Jan xx


Friday, 21 September 2012

Rudolph the red-nosed Reindeer

Hi there,

It's Friday again, which means it's my day off work - I am off up north today to meet up with some very dear crafty friends - you know who you are! See you very soon! Lol

It's also Polkadoodles challenge day!  This week we are looking for cards that are inspired by a song title.  As you may have already guessed, I decided to go all Christmassy - here's my card for the challenge ...


I love the new 'Here Comes Christmas' CD and couldn't resist the cheeky little reindeer.  The background papers, sentiments and the reindeer image are all printed from the CD.  Added embellishments from my stash include some kraft card for layering, a piece of blue polkadot ribbon and a die-cut snowflake which has been frosted with a sprinkling of crystal glitter.  Oh, and don't forget a little red gem for Rudolph's nose! 

Are you ready now, after three?  Can I hear you all singing??

Don't forget to check out the blog here for some more great inspiration from my fab teamies.

Have a great weekend,
Hugz, Jan xx

Sunday, 16 September 2012

Long Time, No See ...

Well Hello Blogland!

First of all, my apologies - I can't believe it's been three weeks since my last blog post!  So much has happened in such a short space of time.  The main event being my internet suddenly going down, totally out of the blue, and our rubbish service provider taking nearly two weeks to restore it!!!  Note to self - change service provider! Lol.

I can't believe how isolated I felt not being able to get on the internet (sad, I know).  We even resorted to purchasing time from another provider (mainly to let people know that I hadn't disappeared into cyberspace.

I've also had a couple of family problems, together with returning to school after my six week break, which is always manic!!

Anyhow, I'm back and still crafting - it would take more than that to put me off my favourite hobby.  I have a card to show today which I am entering into 'Lili's Little Fairies Challenge' - I have become rather addicted to my LOTV stamps lately and this was a perfect reason to use them.  They are playing bingo this week and it was a difficult choice which embellishments to use - in my true greedy style, I think I managed to use them all in some way - so you could say I have a full house!!  Here's what I made ...


I started out using the line 'Ribbons - Gems - Pearls', but by the time I had finished I had just about used them all!  The background paper has flowers on and the top two layers from my 'Love Letters' paper stack are glittered.  The stamped image is 'Dandelion' by LOTV and is coloured with Promarkers and a touch of crystal glitter and mounted on two die-cut Lacy Circles.  The sentiment is also from LOTV.  I have used a piece of ivory seam binding (from Wild Orchid Crafts) for the ribbon and added a bow, button and pearl headed pin (also from WOC).  The card is embellished with three flat back pearls, some pink adhesive gems, a couple of brads and a little heart charm.

I am also entering this one into the 'Wild Orchid Challenge' which is 'Layer it Up'.

Hope everyone has a great Sunday evening,
Hugz, Jan xx


Sunday, 26 August 2012

It's all about the Texture

Hi there,

I hope everyone is enjoying their weekend - we have had quite a bit of rain here.  I have been playing a continuous game of washing out/washing in all weekend! In between my crafting, of course! Lol.

I have gone all 'Steampunk' today making a special card for a design team call.  The theme is 'Texture' and I have tried to show this in several ways.  Here's what I made ...


The background paper is from the TH 'Lost and Found' paper stack and I distressed the edges with my scissors, before inking them with Walnut Stain distress ink.  I then inked through the clock mask and heat embossed some little cogs and gears down the right hand side with gold detail embossing powder.  I stamped some wings, gears and paint splodges onto the background paper and added some little torn pieces of text from an old book.

The main image is a Kanban stamp - partly coloured with Promarkers and the jacket is paper pieced. The image is backed with brown coredinations cardstock cut using a Spellbinders Labels Seventeen die.  It has been dry embossed with an embossing folder and then sanded back to show the core.

The 'Steampunk' lettering was mainly created on my pc, apart from the letter 'S' which was cut from a piece of card covered in metal tape, embossed and coloured with alcohol inks.  The flower was made in the same way.

Additional embellishments include a heart cut from corrugated card and inked with distress ink together with an additional brass-coloured wirework heart, a little brass clockface (which I added some chain to), some metal washers and a 'Dare to Create' sentiment.  I also treat some parts of the card to a sprinkling of gold Frantage embossing powder.

I think I managed to get some texture in there - hope I didn't overdo it! Lol.  I am off to submit it now and should find out at the beginning of September if I have been successful.  I hope so - wish me luck.

Hugz, Jan xx

Saturday, 25 August 2012

Chocolate Box


Hello there,

It's my turn to post on the Studio 12 blog again today and I have a little gift idea to show you using a box template and the Studio 12 Picknix CD ...


I printed two sheets of the pink polkadot paper, reloaded them into the printer and then printed the box template on the reverse.  I cut, scored, folded and inked the pieces before cutting an aperture into the front using my nestabilities.  I secured a piece of acetate behind the aperture and added a scalloped circle border around the outside.  Once glued together the box was decorated with a sentiment from the CD, a little heart and charm, some die cut flowers and the cute little pink daisies from the CD.  I nestled some tissue paper in the bottom of the box and filled with chocolate, before fastening with a piece of co-ordinating organza ribbon.  A lovely little gift which took me about 40 minutes to create (which my daughter then tried to pinch. How rude!).

Note:  the box template is from the Polkadoodles 'Paper Boutique' (Vol 1) CD.

Have a great weekend,
Hugz, Jan xx

Friday, 24 August 2012

A Bit of Stitching

Good morning,

I can't believe it's Friday again already! This week has just flown by and it's time for another challenge over at the Polkadoodles blog.  This week Shell has challenged us to use some stitching on our projects (real or faux).  Here's my design team card for a little bit of inspiration ...


I love the 8x8" card and I have used three different papers from the Candy Doodles CD and layered them on co-ordinating cardstock.  I have stitched around the edge of all three pieces and added some distress ink for extra depth.  The challenge is also to use a gorgeous Emma Canning image and I couldn't decide which one to choose, so I added three on this card!  I love how Emma's girls can be layered up to create a single image, which was coloured with my Promarkers.  The sentiment is also from the Candy Doodles CD and I thought it fit the little group of 'friends' perfectly.  Lots of added embellishments from my stashbox to finish the card.  Hope you like it!

I shall look forward to visiting your blogs to check out the entries for this week's challenge.

Hugz, Jan xx